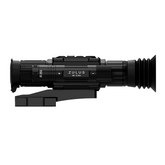
ARKEN ZULUS ZEROING
How To Zero Your Arken ZULUS
 Now that you got your ZULUS mounted and connected to the APP lets go through how to zero the ZULUS reticle. There are two ways to achieve this and it is pretty easy to do. You can zero the reticle via the APP or through the internal menu settings in the ZULUS itself. Let us start with the internal menu. Turn on your ZULUS and then press and hold down the menu button to enter the settings menu. Move over to Zero Reticle. Press the up (video capture) button to choose that selection. You will see the screen seen below. We will go through the one shot zero procedure.
  You will start with the gun profile indicated by a letter highlighted in teal green. There are 26 gun profiles to choose from, A to Z. Press the up (video capture) or down (menu) button to change gun profiles. Once you have selected the gun profile you want to use press the right (brightness) button to move over to the X (windage) adjustment. Here you can take a shot at your target at the distance you want to zero the reticle. You can zoom in with the magnification wheel while in the Zero Reticle settings. If you can see your point of impact (POI) keep the reticle aimed at your point of aim (POA). Press the power button once and this will freeze the image in the ZULUS. Now you can move the X and Y values to move the reticle to the POI. X will move the reticle left and right. Use the up button to move the reticle to the right and down button to move the reticle to the left. You can press and hold these buttons (not at the same time) to rapidly adjust the values. You will see the reticle move. Once you have moved the reticle horizontally to the position you want press the right button quickly to adjust the Y values. This will adjust the reticle up and down. Press the up button to move the reticle up, press the down button to move the reticle down. Move over to the Shape option to change the style of reticle.
1. MILS Reticle
2. Z-Plex Crosshairs
3. Small + reticle
4. Hold over brackets with horseshoe
5. MOA Reticle
You can also move over one more to Color and change the color of your reticle. However you can always change the reticle color when using the ZULUS by pressing the settings menu button quickly. In order to save your reticle position press and hold down the left (IR) button. This will save the position of the reticle an exit the settings menu completely. If you do not want to save what you have done you can press and hold down the right (brightness) button to exit and go back to the menu.  Now we will walk you through how to zero the reticle using the Arken Optics App. We shall assume you have already downloaded the app and connected it to the ZULUS using the WI-FI mode in the ZULUS. Enter the app and connect to the ZULUS. You will enter the device and see the screen to the left. You live view will differ but you an see the options at the top of your mobile device. Press the second option to the left. You will see the image below. If you try to change the settings you will see a message to “Please freeze the device first”. This is just like the instructions above.
 You need to aim your ZULUS at the target, fire a shot. While holding the reticle at your point of aim, press the power button quickly to Once the ZULUS image is frozen you can start moving the reticle. You can tap the up or down arrows for X to move the reticle right or left. You can tap the up and down arrows next to Y to move the reticle up and down. Or the easier way is to simply drag the reticle, with your finger touching the screen of your mobile device, and physically move it to the point of impact. You can press Shape to change reticle styles. Press OK to save. Press Reset to undo what you did and go back to default position. Return will exit without saving.
Zeroing with the App is easier than doing it with the ZULUS menu. However you cannot change gun profiles in the App. So make sure you select the gun profile you want to change first, then enable Wi-Fi and use the app to zero the reticle.
